go-zero-demo

项目设计
说明
项目是通过 zo-zero 框架实现一个简单的用户订单系统,包括两个微服务用户服务和订单服务,通过 API 接口能够分别调用两个服务的接口,用户服务暴露 RPC 服务接口供订单服务进行调用。下面截图是我的操作过程
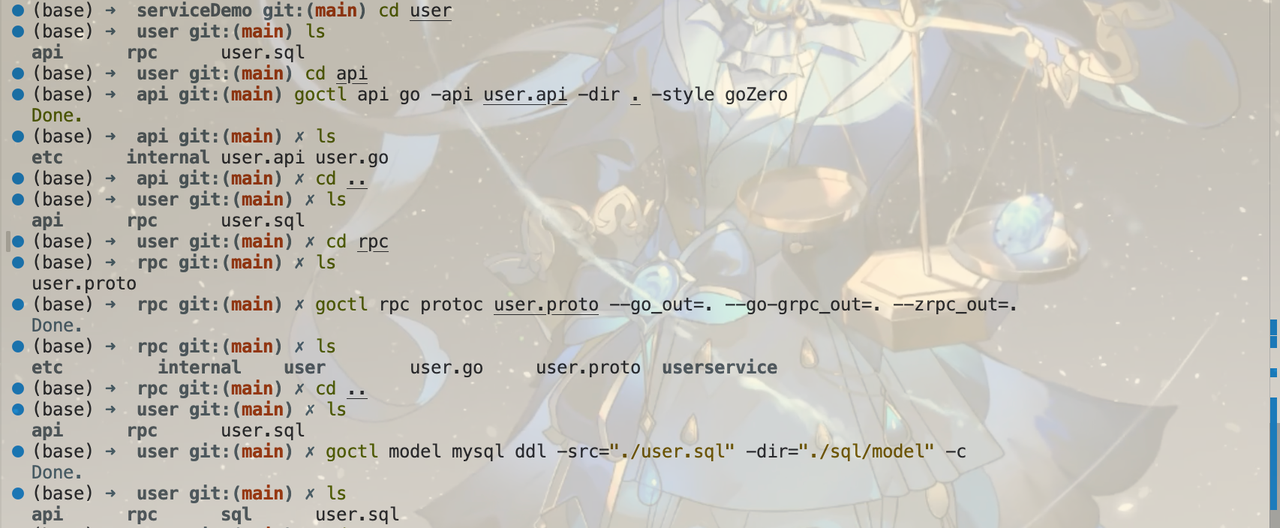
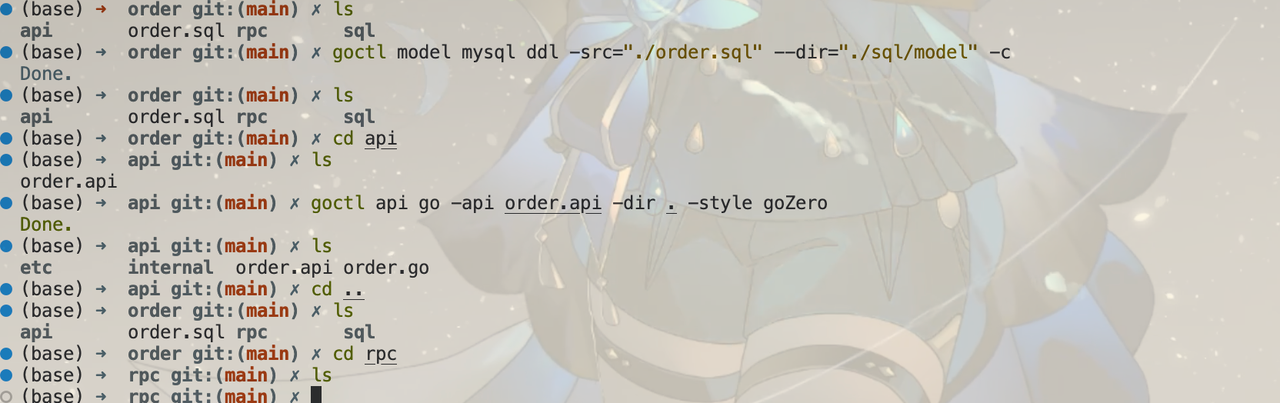
API
goctl指令
goctl api go -api user.api -dir . -style goZero
goctl api go -api order.api -dir . -style goZero
User
syntax = "v1"

// 进行项目的简单说明
info (
    title:   "实现简单的用户服务"
    author:  "aorangehc"
    date:    "2025年 11 月 11 日"
    version: "v1"
)

// 注册需要用户名、密码、手机号码,要做唯一性检测
type RegisterReq {
    UserName   string `json:"username"`
    Password   string `json:"password"`
    Repassword string `json:"re_password"`
    Mobile     string `json:"mobile"`
    Gender     int    `json:"gender,options=0|1|2,default=0"` // male|female|unknown
    NickName   string `json:"nickname"`
}

type RegisterResp {
    success bool   `json:"success"` // 注册是否成功
    Message string `json:"message"` // 注册报错信息
    Id      int64  `json:"id"` // 成功注册返回的 id
}

type LoginReq {
    UserName string `json:"username"`
    Password string `json:"password"`
}

type LoginResp {
    Message      string `json:"message"`
    AccessToken  string `json:"accessToken"`
    AccessExpire int64  `json:"accessExpire"`
    RefreshAfter int64  `json:"refreshAfter"`
}

type UserInfoReq {
    Id int64 `json:"id"`
}

type UserInfoResp {
    Id       int64  `json:"id"`
    Token    string `json:"token"`
    UserName string `json:"username"`
    Mobile   string `json:"mobile"`
    Gender   int    `json:"gender,options=0|1|2,default=0"` // male|female|unknown
    NickName string `json:"nickname"`
    CreateAt string `json:"createAt"` // 注册时间
    UpdateAt string `json:"updateAt"` // 最后更新时间
}

// 用户信息更新
type UserUpdateReq {
    Id       int64  `json:"id"`
    UserName string `json:"username"`
    Password string `json:"password"`
    Mobile   string `json:"mobile"`
    Gender   int    `json:"gender,options=0|1|2,default=0"` // male|female|unknown
    NickName string `json:"nickname"`
}

type UserUpdateResp {
    success bool   `json:"success"`
    Message string `json:"message"` // 更新报错信息
}

// 定义用户服务的 Api
@server (
    prefix: api
)
service user-api {
    @handler register
    post /user/register (RegisterReq) returns (RegisterResp)

    @handler login
    post /user/login (LoginReq) returns (LoginResp)
}

@server (
    prefix: api
    jwt:    Auth
)
service user-api {
    @handler userInfo // 获取用户信息
    get /user/:id (UserInfoReq) returns (UserInfoResp)
}
Order
syntax = "v1"

info (
    title:   "订单服务简单 demo"
    author:  "aorangehc"
    date:    "2025年 11 月 11 日"
    version: "v1"
)

// 创建订单
type CreateReq {
    UserId  int64 `json:"userId"`
    GoodsId int64 `json:"goodsId"`
    Num     int64 `json:"num"`
    Amount  int64 `json:"amount"`
}

type CreateResp {
    OrderSn string `json:"orderSn"`
}

// 查看订单详情
type DetailReq {
    OrderSn string `json:"orderSn"`
}

type DetailResp {
    OrderSn  string `json:"orderSn"`
    UserId   int64  `json:"userId"`
    GoodsId  int64  `json:"goodsid"`
    Num      int64  `json:"num"`
    Amount   int64  `json:"amount"`
    Status   int64  `json:"status"`
    CreateAt string `json:"createAt"`
}

// 删除订单
type DeleteReq {
    userId  int64  `json:"userId"`
    OrderSn string `json:"orderSn"`
}

type DeleteResp {
    success bool   `json:"success"`
    Message string `json:"message"`
}

service order-api {
    @handler create
    post /api/order/create (CreateReq) returns (CreateResp)

    @handler detail
    get /api/order/:orderSn (DetailReq) returns (DetailResp)

    @handler delete
    delete /api/order/delete (DeleteReq) returns (DeleteResp)
}
RPC
goctl指令
goctl rpc protoc user.proto --go_out=. --go-grpc_out=. --zrpc_out=.User
// 暴露一个 user 服务对外接口,获取用户信息

syntax = "proto3";

option go_package = "./user";

// 定义请求结构体
message GetUserInfoRequest {
    int64 user_id = 1; // 用户ID
}

// 定义响应结构体
message GetUserInfoResponse {
    int64 user_id = 1; // 用户ID
    string user_name = 2; // 用户名
    int64 gender = 3; // 用户性别
}

// 定义 UserService 服务
service UserService {
    // 获取用户信息
    rpc GetUserInfo(GetUserInfoRequest) returns (GetUserInfoResponse);
}
MySQL
goctl指令
goctl model mysql ddl -src="./user.sql" -dir="./sql/model"
goctl model mysql ddl -src="./order.sql" --dir="./sql/model"
User
CREATE TABLE user (
    id bigint AUTO_INCREMENT,
    name varchar(255) NULL COMMENT '用户名',
    password varchar(255) NOT NULL DEFAULT '' COMMENT '密码',
    mobile varchar(255) NOT NULL DEFAULT '' COMMENT '手机号码',
    gender char(10) NOT NULL DEFAULT 'male' COMMENT '性别,male|female|unknown',
    nickname varchar(255) NULL DEFAULT '' COMMENT '昵称',
    type tinyint(1) NULL DEFAULT 0 COMMENT '用户类型, 0:普通用户,1:VIP用户,用于测试golang关键字',
    create_at timestamp NULL,
    update_at timestamp NULL DEFAULT CURRENT_TIMESTAMP ON UPDATE CURRENT_TIMESTAMP,
    UNIQUE mobile_index (mobile),
    UNIQUE name_index (name),
    PRIMARY KEY (id)
) ENGINE = InnoDB COLLATE utf8mb4_general_ci COMMENT '用户表';
Order
CREATE TABLE `order` (
    `order_sn` VARCHAR(64) NOT NULL COMMENT '订单号',
    `user_id` BIGINT NOT NULL DEFAULT 0 COMMENT '用户ID',
    `goods_id` BIGINT NOT NULL DEFAULT 0 COMMENT '商品ID',
    `num` BIGINT NOT NULL DEFAULT 0 COMMENT '数量',
    `amount` BIGINT NOT NULL DEFAULT 0 COMMENT '金额',
    `status` INT NOT NULL DEFAULT 0 COMMENT '状态',
    `create_at` DATETIME DEFAULT CURRENT_TIMESTAMP COMMENT '创建时间',
    `delete_at` DATETIME DEFAULT NULL COMMENT '删除时间',
    PRIMARY KEY (`order_sn`)
) ENGINE=InnoDB COLLATE utf8mb4_general_ci COMMENT='订单表';
MySQL配置和model操作
已经完成了项目结构的初步搭建,下一步我们进行数据库的配置,这里我们从头开始,使用 docker 创建表。下面是相关的指令。
创建 MySQL 数据库和表
# 使用 docker 拉取 docekr 的镜像
docker pull mysql:8.0

# 使用镜像创建容器
docker run -d --name testMySQl \ # 容器名称
  -e MYSQL_ROOT_PASSWORD=123456 \ # 数据库密码
  -e MYSQL_DATABASE=goframework \ # 数据库名称
  -p 3307:3306 \ # 容器内 3306 端口映射到 3307,因为我的 3306 被占用了
  -v $PWD/mysql-data:/var/lib/mysql \ # 将存储映射到外部
  mysql:8.0 --default-authentication-plugin=mysql_native_password

# 进入容器
docker exec -it testMySQl /bin/sh

# 进入数据库
mysql -uroot -p123456

# 看一下已有的数据库
show databases;

# 创建一个数据库
create database user_order;

# 使用数据库
use user_order;;

# 看一下表
show tables;

# 创建一个用户表
CREATE TABLE `user` (
    id bigint AUTO_INCREMENT,
    name varchar(255) NULL COMMENT '用户名',
    password varchar(255) NOT NULL DEFAULT '' COMMENT '密码',
    mobile varchar(255) NOT NULL DEFAULT '' COMMENT '手机号码',
    gender char(10) NOT NULL DEFAULT 'male' COMMENT '性别,male|female|unknown',
    nickname varchar(255) NULL DEFAULT '' COMMENT '昵称',
    type tinyint(1) NULL DEFAULT 0 COMMENT '用户类型, 0:普通用户,1:VIP用户,用于测试golang关键字',
    create_at timestamp NULL,
    update_at timestamp NULL DEFAULT CURRENT_TIMESTAMP ON UPDATE CURRENT_TIMESTAMP,
    UNIQUE mobile_index (mobile),
    UNIQUE name_index (name),
    PRIMARY KEY (id)
) ENGINE = InnoDB COLLATE utf8mb4_general_ci COMMENT '用户表';

# 创建订单表
CREATE TABLE `order` (
    `order_sn` VARCHAR(64) NOT NULL COMMENT '订单号',
    `user_id` BIGINT NOT NULL DEFAULT 0 COMMENT '用户ID',
    `goods_id` BIGINT NOT NULL DEFAULT 0 COMMENT '商品ID',
    `num` BIGINT NOT NULL DEFAULT 0 COMMENT '数量',
    `amount` BIGINT NOT NULL DEFAULT 0 COMMENT '金额',
    `status` INT NOT NULL DEFAULT 0 COMMENT '状态',
    `create_at` DATETIME DEFAULT CURRENT_TIMESTAMP COMMENT '创建时间',
    `delete_at` DATETIME DEFAULT NULL COMMENT '删除时间',
    PRIMARY KEY (`order_sn`)
) ENGINE=InnoDB COLLATE utf8mb4_general_ci COMMENT='订单表';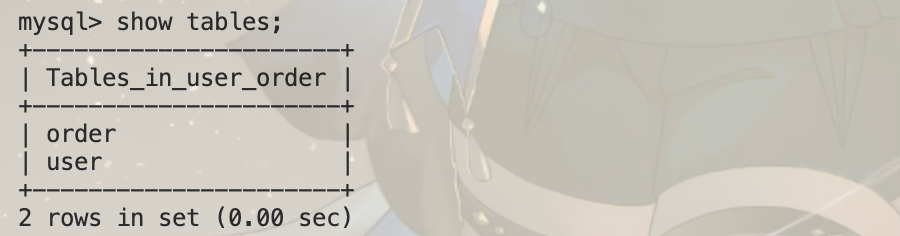
项目连接数据库
- 先修改配置文件,在配置中增加数据库相关配置
root:123456@tcp(127.0.0.1:3307)/user_order?charset=utf8mb4&parseTime=True&loc=Local
├─┘└──┘└┘└────┘└──┘└─────┘└───────┘└───────┘└────┘
 用户名 密码  协议    主机地址    端口   数据库名    字符集        时间解析     时区
然后修改 yaml文件中的配置信息,写入具体配置
在 servicecontext 中增加数据库相关配置,并连接数据库表
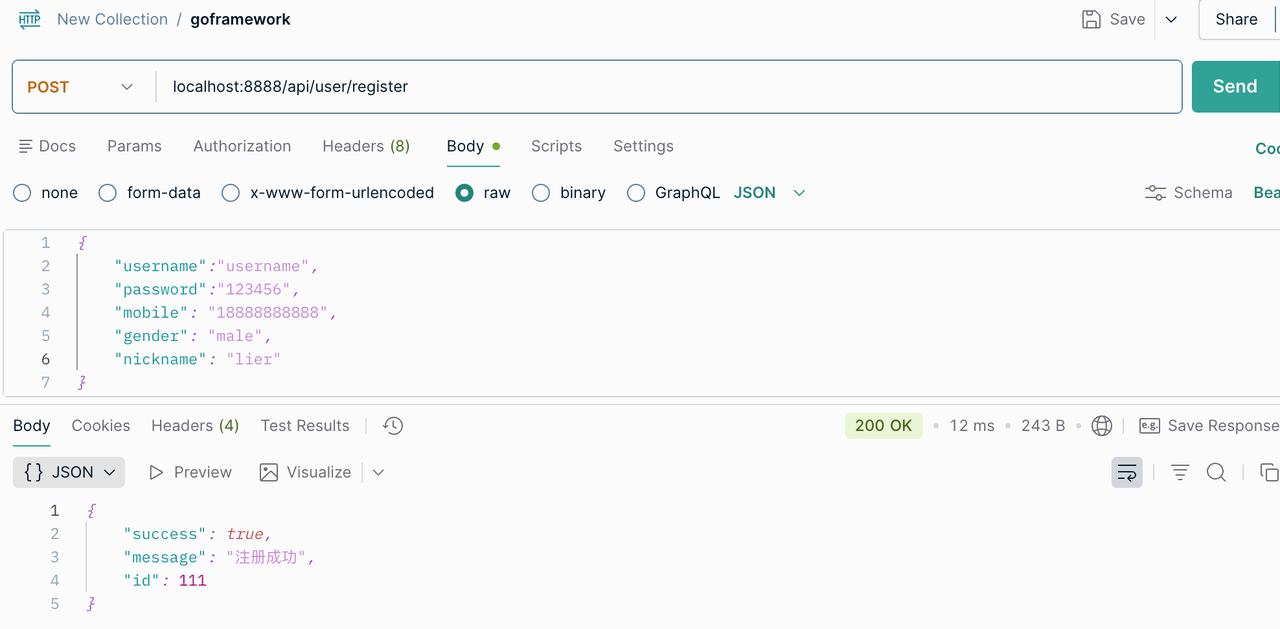
在注册逻辑中进行实现,增加数据写入逻辑
之后进行测试,数据写入

注册
之前我们实现了简单的数据库操作,现在开始我们实现一个简单的注册功能
参数校验(校验参数合法性,判断一下是不是空,还有两次密码认证—)
数据唯一性确认(检查数据库中是否存在已有数据)
加密加盐(使用 md5 进行加密加盐)
// 加密加盐
    h := md5.New()
    h.Write([]byte(req.Password))
    h.Write(secret)
    passwordStr := hex.EncodeToString(h.Sum(nil))
下面是效果验证
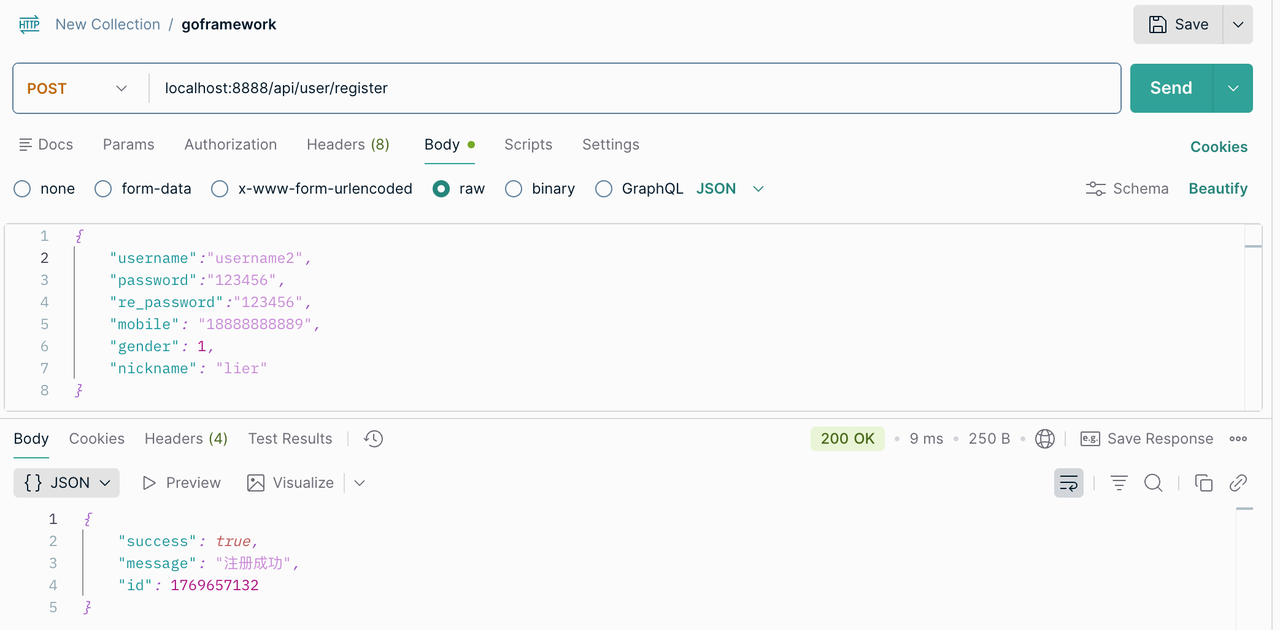
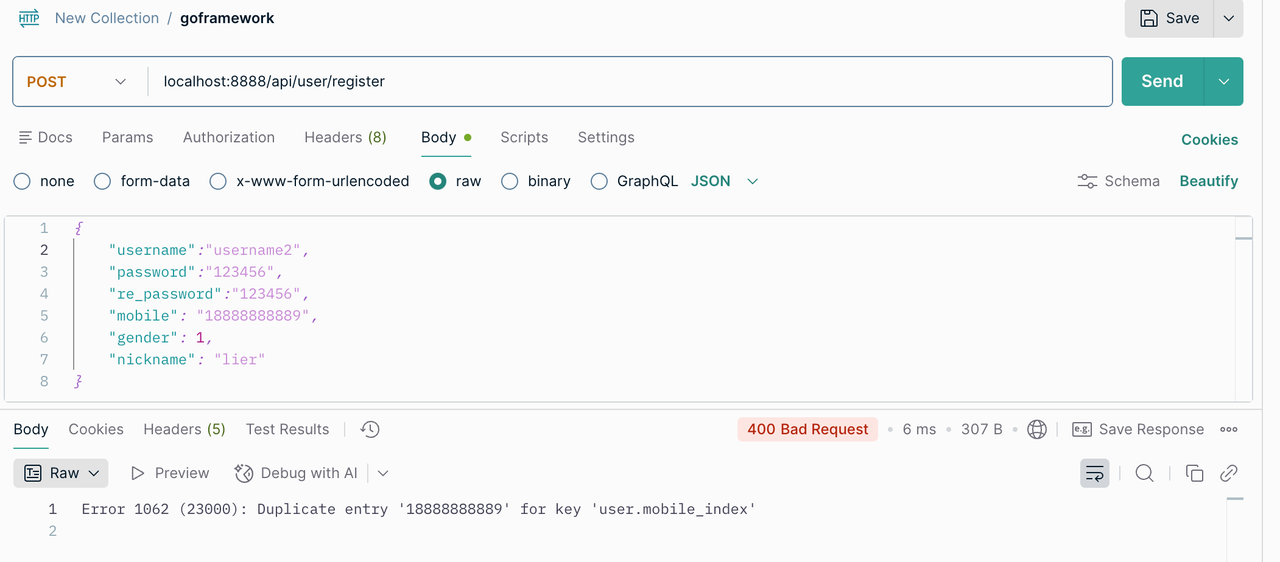
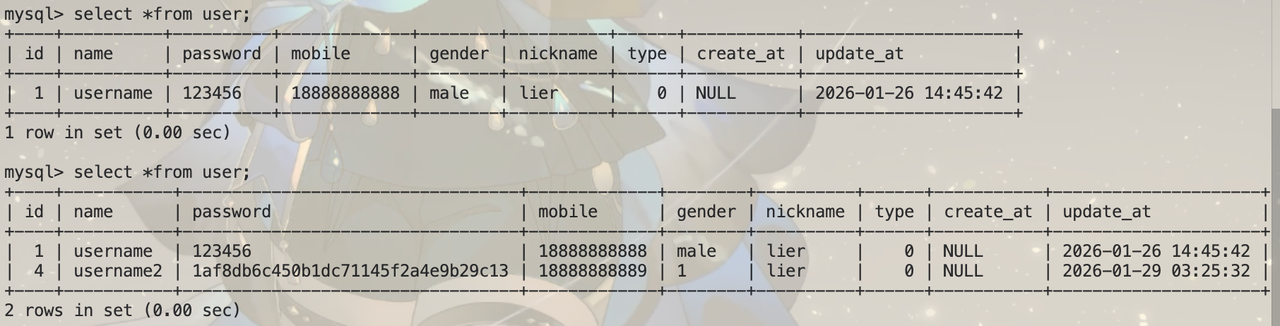
缓存
go-zero缓存
首先讲一下缓存,简单来说缓存就是把下次可能用到的数据先存下来,这样下次需要的时候就不用再慢慢去找,能有效提升加载速度和用户体验。
在我们日常生活中使用浏览器加载网页一般都会进行缓存,所以一般第一次加载都会很慢,我之前遇到过一个情况,部署在 GitHub Page 的网页会一直缓存着第一次加载的数据,很奇怪,要在浏览器进行单独设置后才会解决这个问题
在电商场景或者是应用场景下,会将读得特别多、计算成本高、不经常变化的数据或者是需要快速响应的数据进行缓存,既是为了降低成本,也是为了提升效率。
缓存最常用的数据库就是 Redis,Redis 也在逐渐迭代,适配更多的缓存场景。
在 go-zero中,可以通过”-c”参数设置缓存的使用,我们在目前的用户订单系统进行简单的缓存实现,首先使用下面指令,生成缓存相关代码
goctl model mysql ddl -src="./user.sql" --dir="./sql/cachemodel" -c下面是有无缓存代码的对比
// 有缓存
func (m *defaultUserModel) FindOneByMobile(ctx context.Context, mobile string) (*User, error) {
    userMobileKey := fmt.Sprintf("%s%v", cacheUserMobilePrefix, mobile)
    var resp User
    err := m.QueryRowIndexCtx(ctx, &resp, userMobileKey, m.formatPrimary, func(ctx context.Context, conn sqlx.SqlConn, v any) (i any, e error) {
        query := fmt.Sprintf("select %s from %s where `mobile` = ? limit 1", userRows, m.table)
        if err := conn.QueryRowCtx(ctx, &resp, query, mobile); err != nil {
            return nil, err
        }
        return resp.Id, nil
    }, m.queryPrimary)
    switch err {
    case nil:
        return &resp, nil
    case sqlc.ErrNotFound:
        return nil, ErrNotFound
    default:
        return nil, err
    }
}

//无缓存
func (m *defaultUserModel) FindOneByMobile(ctx context.Context, mobile string) (*User, error) {
    var resp User
    query := fmt.Sprintf("select %s from %s where `mobile` = ? limit 1", userRows, m.table)
    err := m.conn.QueryRowCtx(ctx, &resp, query, mobile)
    switch err {
    case nil:
        return &resp, nil
    case sqlx.ErrNotFound:
        return nil, ErrNotFound
    default:
        return nil, err
    }
}
有了缓存需求之后,我们就要配置缓存数据库了
- 先看生成的带缓存的usermodel.go文件并深入查看数据结构的设计,我们能发现需要的新版的配置类型是cache.CacheConf,深入发现需要的参数在RedisConf中,这是我们需要在 yaml 文件中设置的内容。
// NewUserModel returns a model for the database table.
func NewUserModel(conn sqlx.SqlConn, c cache.CacheConf, opts ...cache.Option) UserModel {
    return &customUserModel{
        defaultUserModel: newUserModel(conn, c, opts...),
    }
}


type (
    // A ClusterConf is the config of a redis cluster that used as cache.
    ClusterConf []NodeConf

    // A NodeConf is the config of a redis node that used as cache.
    NodeConf struct {
        redis.RedisConf
        Weight int `json:",default=100"`
    }
)

type (
    // A RedisConf is a redis config.
    RedisConf struct {
        Host     string
        Type     string `json:",default=node,options=node|cluster"`
        User     string `json:",optional"`
        Pass     string `json:",optional"`
        Tls      bool   `json:",optional"`
        NonBlock bool   `json:",default=true"`
        // PingTimeout is the timeout for ping redis.
        PingTimeout time.Duration `json:",default=1s"`
    }

    // A RedisKeyConf is a redis config with key.
    RedisKeyConf struct {
        RedisConf
        Key string
    }
)
然后修改 config.go和 yaml 文件我们简单配置
然后就结束了,剩下的框架都给你实现了。
docker使用 redis
# 拉取镜像
docker pull redis:8
# 创建容器
docker run -d --name testRedis -p 6379:6379 redis:8
# 进入容器
docker exec -it testRedis redis-cli
# 看一下keys
keys cache:user:name:*
# 退出
exit
测试
通过结合 postman测试发现会逐渐将搜索加入缓存
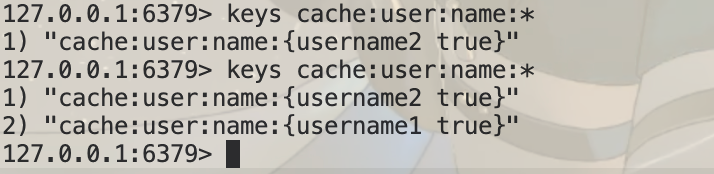
这只是一个简单的使用,实际 redis的功能和应用范围非常广泛
日志
在 config默认的结构体中嵌入了 go-zero的log配置项,下面是他的完整设计,我们在 yaml文件中创建 Log并进行下面参数的配置
# 配置
Log:
  ServiceName: user-api-srv
  Mode: file
  Encoding: json
  Path: logs
  Level: info
  Stat: true
type (
// A LogConf is a logging config.
LogConf struct {
// ServiceName represents the service name.
ServiceName string `json:",optional"`
// Mode represents the logging mode, default is `console`.
// console: log to console.
// file: log to file.
// volume: used in k8s, prepend the hostname to the log file name.
Mode string `json:",default=console,options=[console,file,volume]"`
// Encoding represents the encoding type, default is `json`.
// json: json encoding.
// plain: plain text encoding, typically used in development.
Encoding string `json:",default=json,options=[json,plain]"`
// TimeFormat represents the time format, default is `2006-01-02T15:04:05.000Z07:00`.
TimeFormat string `json:",optional"`
// Path represents the log file path, default is `logs`.
Path string `json:",default=logs"`
// Level represents the log level, default is `info`.
Level string `json:",default=info,options=[debug,info,error,severe]"`
// MaxContentLength represents the max content bytes, default is no limit.
MaxContentLength uint32 `json:",optional"`
// Compress represents whether to compress the log file, default is `false`.
Compress bool `json:",optional"`
// Stat represents whether to log statistics, default is `true`.
Stat bool `json:",default=true"`
// KeepDays represents how many days the log files will be kept. Default to keep all files.
// Only take effect when Mode is `file` or `volume`, both work when Rotation is `daily` or `size`.
KeepDays int `json:",optional"`
// StackCooldownMillis represents the cooldown time for stack logging, default is 100ms.
StackCooldownMillis int `json:",default=100"`
// MaxBackups represents how many backup log files will be kept. 0 means all files will be kept forever.
// Only take effect when RotationRuleType is `size`.
// Even though `MaxBackups` sets 0, log files will still be removed
// if the `KeepDays` limitation is reached.
MaxBackups int `json:",default=0"`
// MaxSize represents how much space the writing log file takes up. 0 means no limit. The unit is `MB`.
// Only take effect when RotationRuleType is `size`
MaxSize int `json:",default=0"`
// Rotation represents the type of log rotation rule. Default is `daily`.
// daily: daily rotation.
// size: size limited rotation.
Rotation string `json:",default=daily,options=[daily,size]"`
// FileTimeFormat represents the time format for file name, default is `2006-01-02T15:04:05.000Z07:00`.
FileTimeFormat string `json:",optional"`
// FieldKeys represents the field keys.
FieldKeys fieldKeyConf `json:",optional"`
}
fieldKeyConf struct {
// CallerKey represents the caller key.
CallerKey string `json:",default=caller"`
// ContentKey represents the content key.
ContentKey string `json:",default=content"`
// DurationKey represents the duration key.
DurationKey string `json:",default=duration"`
// LevelKey represents the level key.
LevelKey string `json:",default=level"`
// SpanKey represents the span key.
SpanKey string `json:",default=span"`
// TimestampKey represents the timestamp key.
TimestampKey string `json:",default=@timestamp"`
// TraceKey represents the trace key.
TraceKey string `json:",default=trace"`
// TruncatedKey represents the truncated key.
TruncatedKey string `json:",default=truncated"`
}
)可以使用下面的接口,进行日志的记录
type Logger interface {
    Debug(...any)
    Debugf(string, ...any)
    Debugv(any)
    Debugw(string, ...LogField)
    Error(...any)
    Errorf(string, ...any)
    Errorv(any)
    Errorw(string, ...LogField)
    Info(...any)
    Infof(string, ...any)
    Infov(any)
    Infow(string, ...LogField)
    Slow(...any)
    Slowf(string, ...any)
    Slowv(any)
    Sloww(string, ...LogField)
    WithCallerSkip(skip int) Logger
    WithContext(ctx context.Context) Logger
    WithDuration(d time.Duration) Logger
    WithFields(fields ...LogField) Logger
}
简单测试

login 和userInfo接口
主要进行这两个文件中逻辑的完善
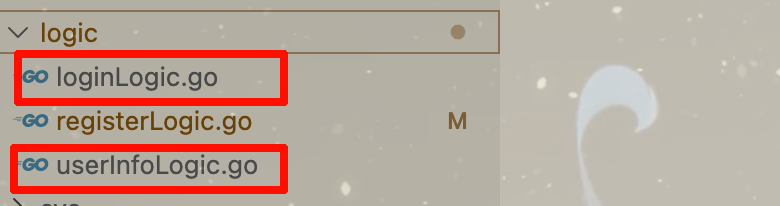
在项目中进行简单实现,具体参照项目代码,点击直达
下面是测试:
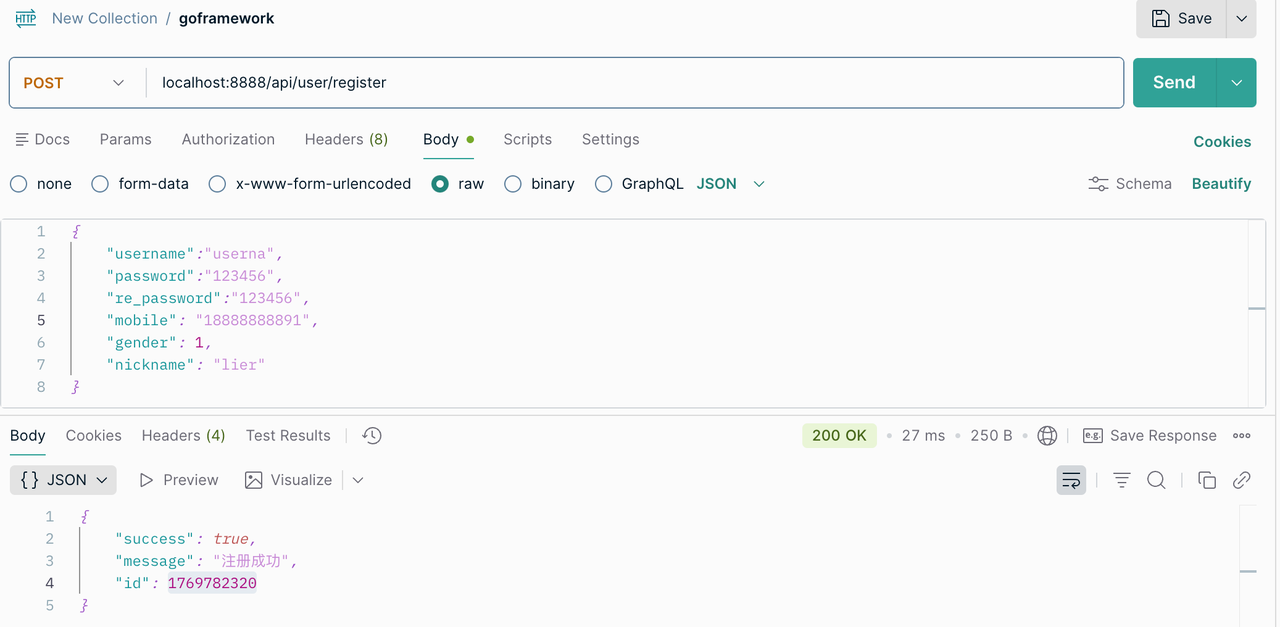
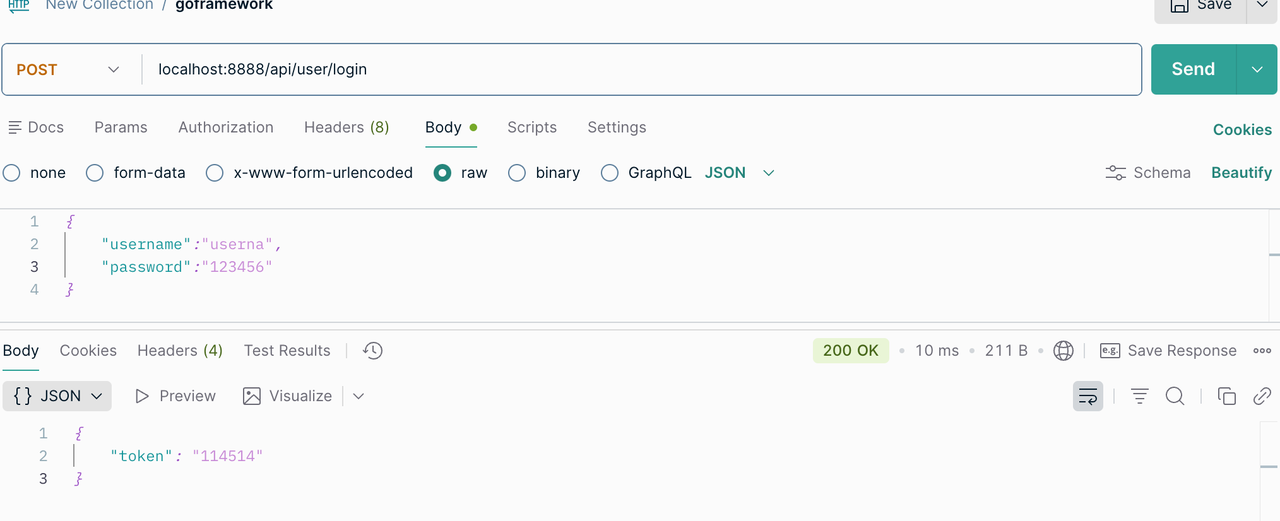
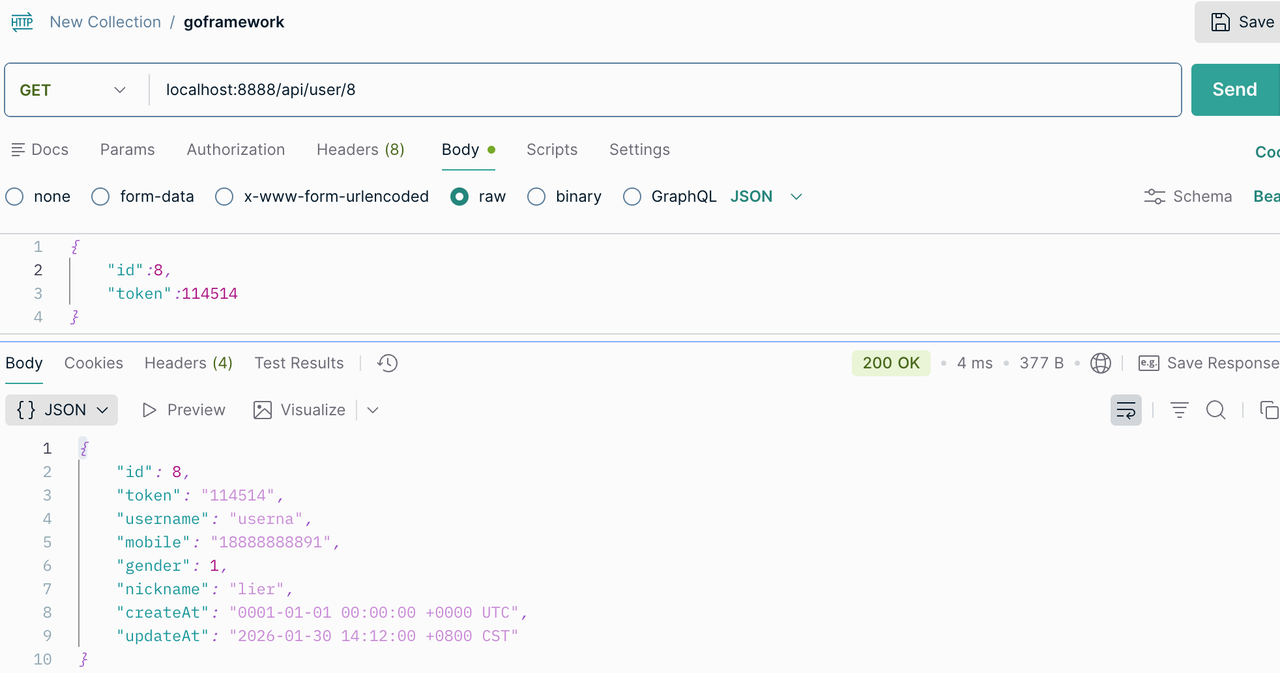
不过项目中还有很多错误,比如 id的写入出现问题,涉及到数据库配置的问题。
JWT 鉴权
JWT的主要流程
用户详情接口需要登陆之后才能进行访问
用户登录成功之后->JSON Web Token(JWT)->前端会把token保存起来,每次后端调用的时候都会带上,继续验证。
后端需要鉴权接口,通常是做成中间件的形式进行鉴权,对请求头中的token进行解析
解析成功就是登录用户
解析失败就是未登录用户或者是失效用户
Refresh token
简单实现和测试
借助github.com/golang-jwt/jwt/v4实现 jwt 认证
还有一个比较重要的问题,jwt token存到哪里了,存到项目的 context 中了,我们从 context 中就能取到值。
token := l.ctx.Value("userId")生成 token
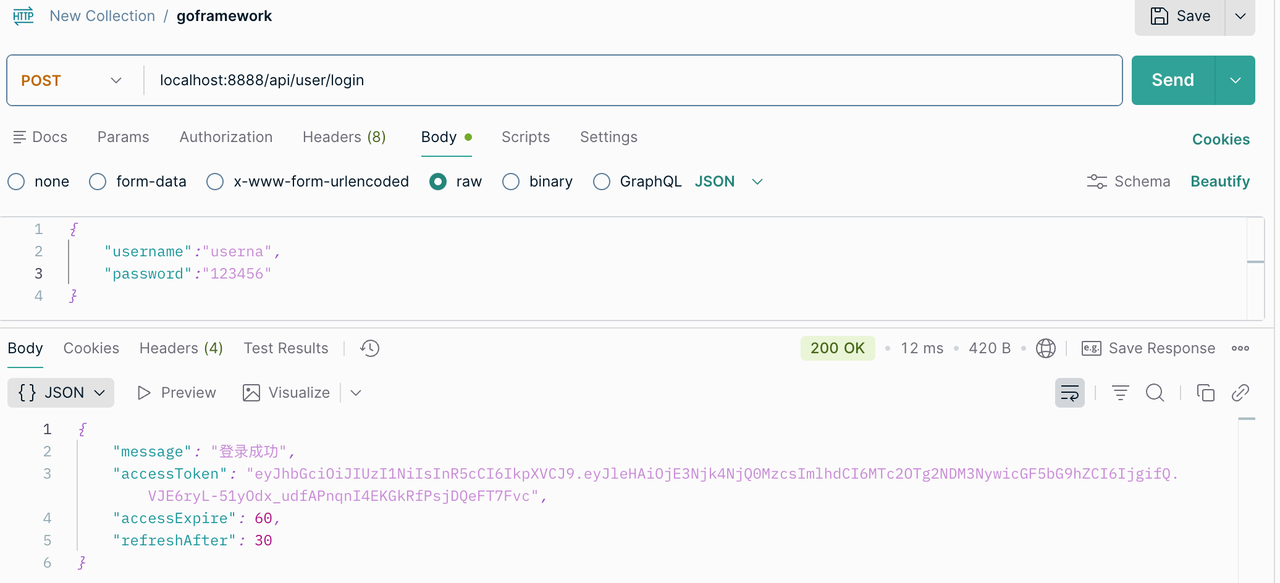
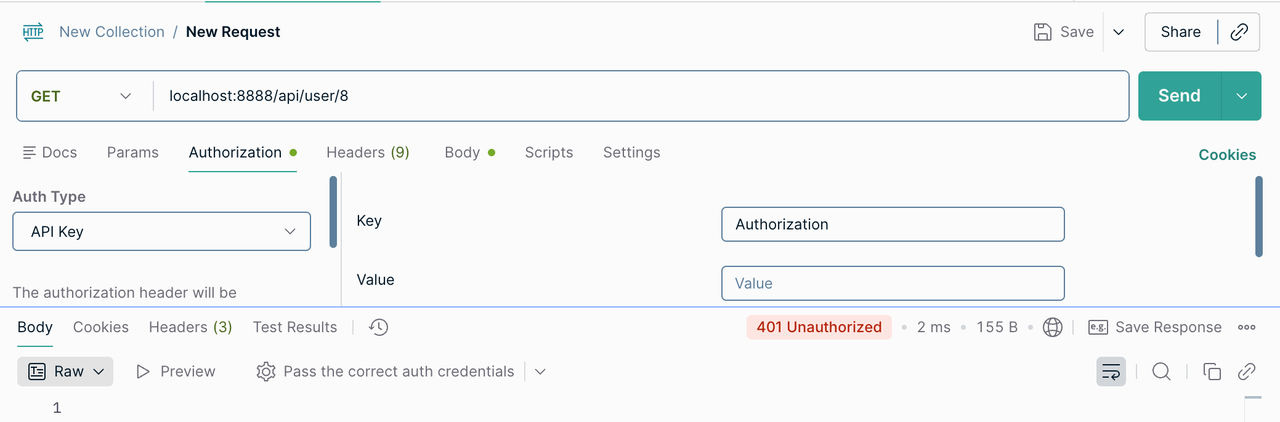
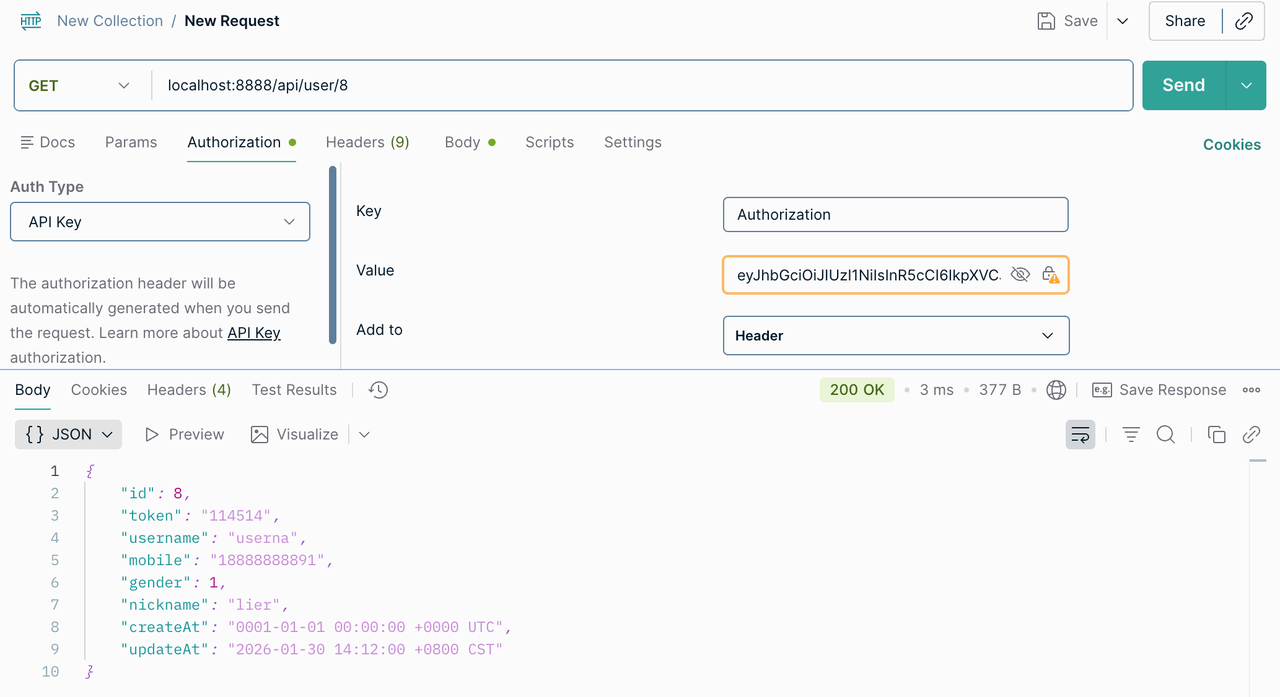
测试没加 token 和加入 token 之后的人一个结果,注意会超时,因为之前设置了 60 秒。
中间件
路由中间件:只给部分路由添加中间件,比如鉴权,性能检测等等
全局中间件:全部都要使用
也能通过闭包调用其他服务中的中间件
中间件定义
我们可以直接在 api文件中进行定义,通过 middleware 中间件
syntax = "v1"

// 进行项目的简单说明
info (
    title:   "实现简单的用户服务"
    author:  "aorangehc"
    date:    "2025年 11 月 11 日"
    version: "v1"
)

// 注册需要用户名、密码、手机号码,要做唯一性检测
type RegisterReq {
    UserName   string `json:"username"`
    Password   string `json:"password"`
    Repassword string `json:"re_password"`
    Mobile     string `json:"mobile"`
    Gender     int    `json:"gender,options=0|1|2,default=0"` // male|female|unknown
    NickName   string `json:"nickname"`
}

type RegisterResp {
    success bool   `json:"success"` // 注册是否成功
    Message string `json:"message"` // 注册报错信息
    Id      int64  `json:"id"` // 成功注册返回的 id
}

type LoginReq {
    UserName string `json:"username"`
    Password string `json:"password"`
}

type LoginResp {
    Message      string `json:"message"`
    AccessToken  string `json:"accessToken"`
    AccessExpire int64  `json:"accessExpire"`
    RefreshAfter int64  `json:"refreshAfter"`
}

type UserInfoReq {
    Id int64 `json:"id"`
}

type UserInfoResp {
    Id       int64  `json:"id"`
    Token    string `json:"token"`
    UserName string `json:"username"`
    Mobile   string `json:"mobile"`
    Gender   int    `json:"gender,options=0|1|2,default=0"` // male|female|unknown
    NickName string `json:"nickname"`
    CreateAt string `json:"createAt"` // 注册时间
    UpdateAt string `json:"updateAt"` // 最后更新时间
}

// 用户信息更新
type UserUpdateReq {
    Id       int64  `json:"id"`
    UserName string `json:"username"`
    Password string `json:"password"`
    Mobile   string `json:"mobile"`
    Gender   int    `json:"gender,options=0|1|2,default=0"` // male|female|unknown
    NickName string `json:"nickname"`
}

type UserUpdateResp {
    success bool   `json:"success"`
    Message string `json:"message"` // 更新报错信息
}

// 定义用户服务的 Api
@server (
    prefix: api
)
service user-api {
    @handler register
    post /user/register (RegisterReq) returns (RegisterResp)

    @handler login
    post /user/login (LoginReq) returns (LoginResp)
}

@server (
    prefix:     api
    jwt:        Auth
    middleware: Cost // 耗时统计的一个中间件
)
service user-api {
    @handler userInfo // 获取用户信息
    get /user/:id (UserInfoReq) returns (UserInfoResp)

    @handler userUpdate // 更新用户信息
    post /user/update (UserUpdateReq) returns (UserUpdateResp)
}
Demo 和测试
更新完成 api文件之后,通过 goctl更新项目,然后完善
GoZeroDemo/serviceDemo/user/api/internal/middleware/costMiddleware.go中的 Handle 方法
GoZeroDemo/serviceDemo/user/api/internal/svc/serviceContext.go中增加 Cost的注册
之后我们运行项目进行测试,打印出耗时

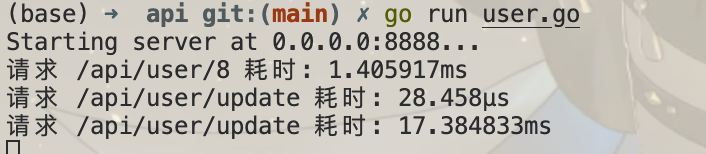
实现一个简单的全局中间件

RPC服务和调用
RPC 服务实现流程
编写 rpc文件
goctl生成项目文件
修改配置结构体和相关的文件
完善项目内容
修改 context 文件
完善 RPC 业务逻辑
测试,使用 postman 测试功能
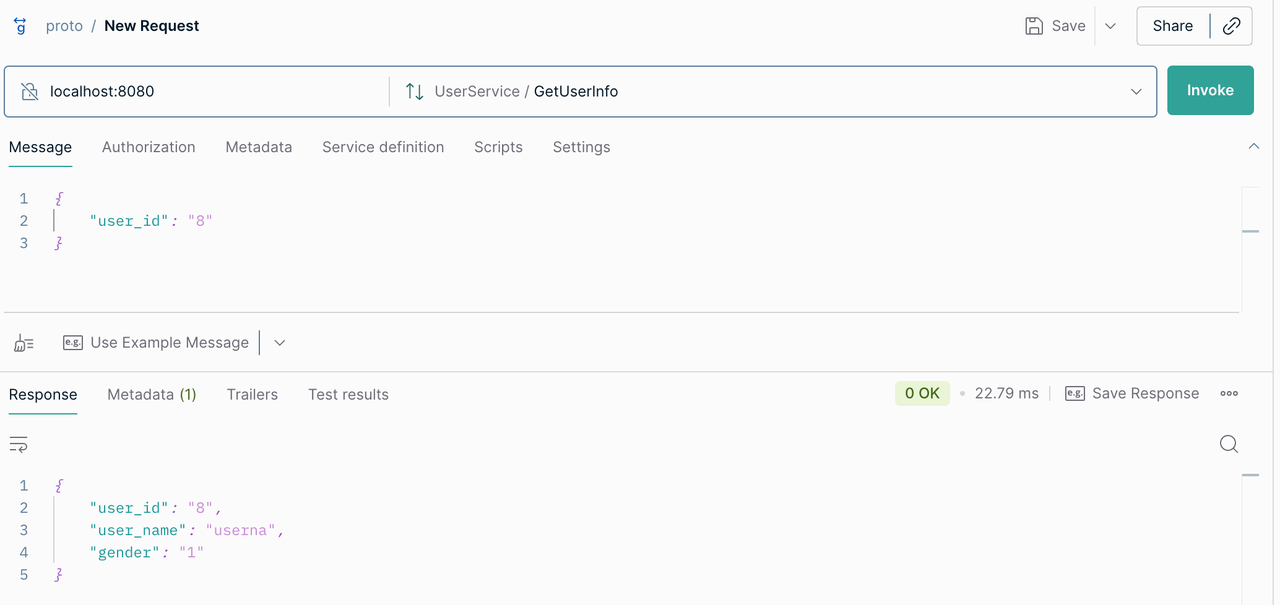
RPC 调用
在 go-zero中进行rpc调用基本要进行以下流程
首先配置 yaml 文件和config 文件
然后在 context 文件中进行数据库连接和 RPC 的配置
之后再 logic 文件中进行 RPC 的调用
下面是测试结果
创建订单
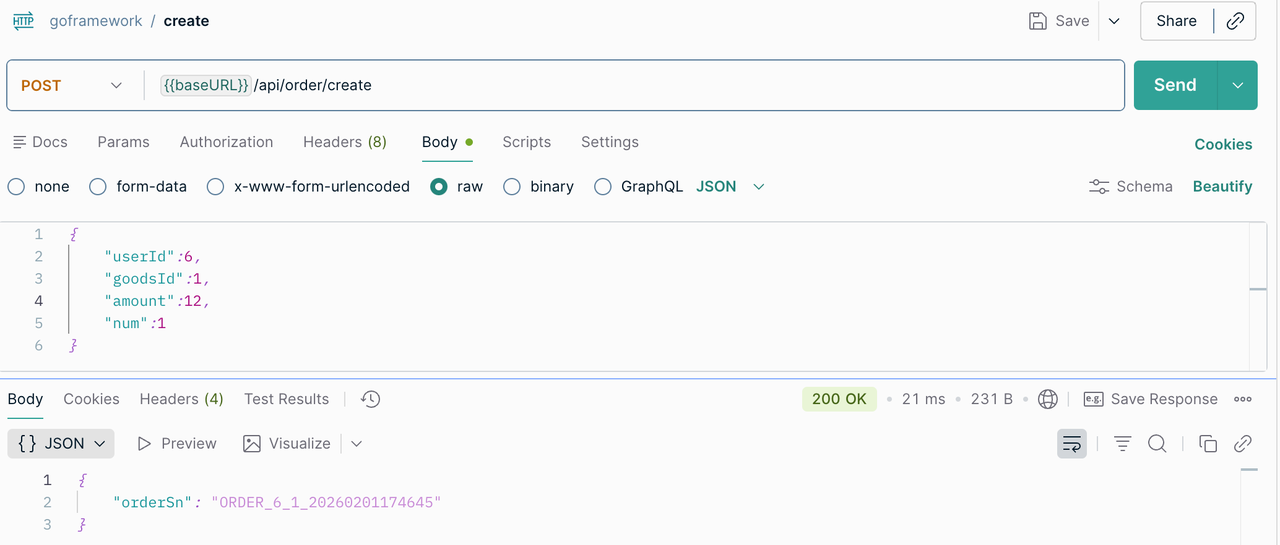
测试订单删除功能
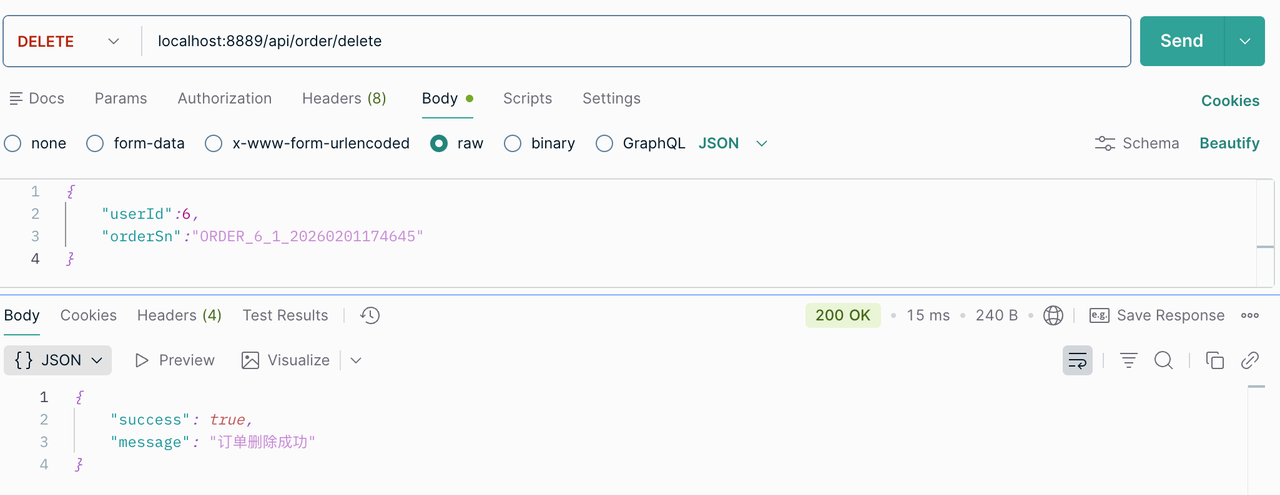
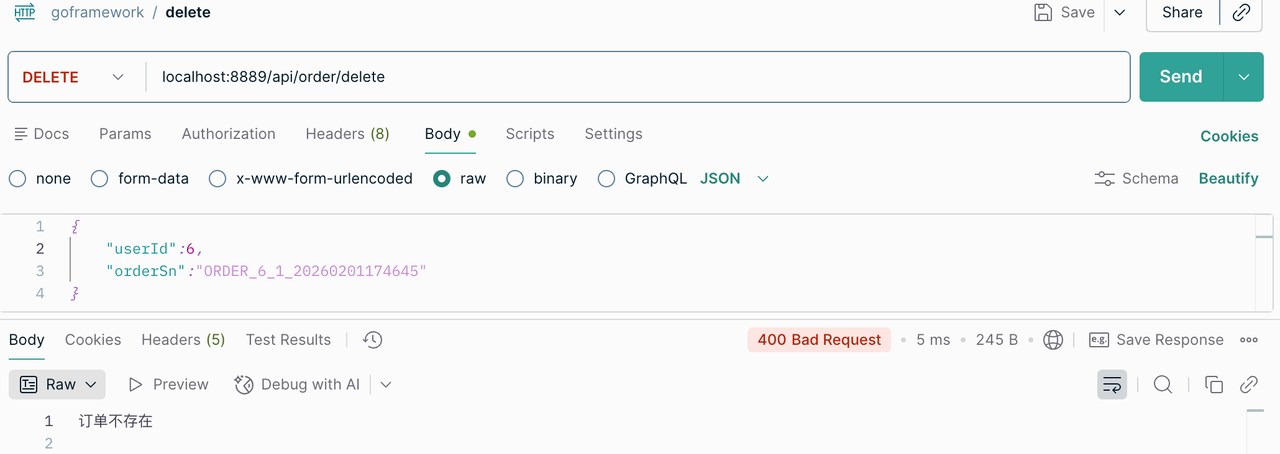
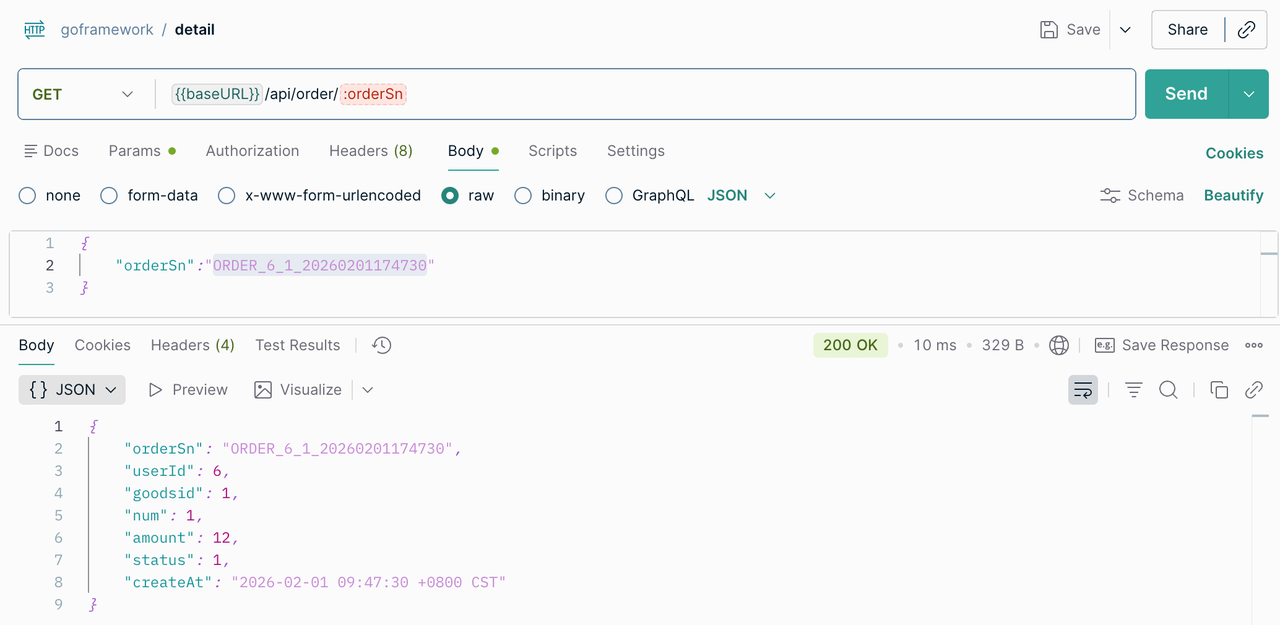
获取订单信息
注册中心-consul
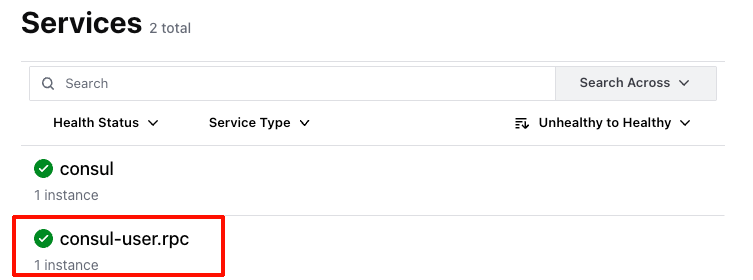
原本使用 Etcd 作为 注册中心,要改成 consul,docker 启动 consul
修改配置文件 yaml 和 config.go,注释掉原来的 etcd
将服务注册到 consul,在启动服务的时候
服务发现方也需要修改配置
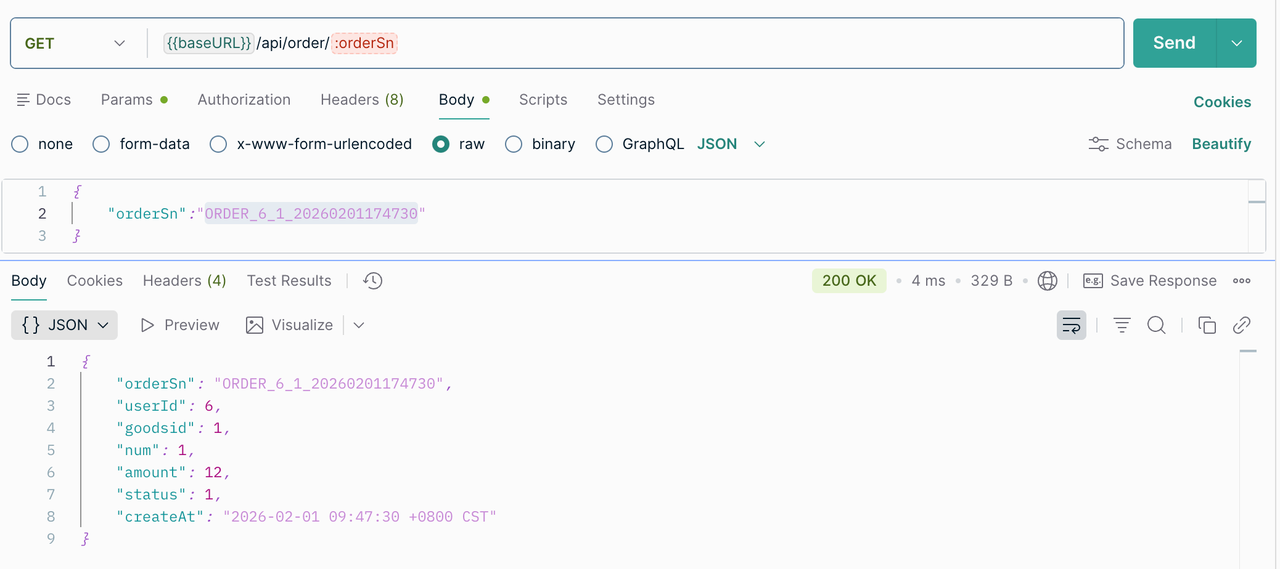
之后启动服务进行测试,测试成功

RPC 调用传递 metadata
metadata(元数据)= 快递单(贴在包裹上的信息:谁寄的、寄给谁、是否易碎)。可以包含:
认证令牌 (Token): JWT Token,用来证明你是谁。
链路追踪 ID (Trace ID): 用来追踪这个请求经过了哪几个微服务(例如 x-request-id)。
客户端信息: 比如 User-Agent,或者客户端版本号。
超时控制: 告诉服务端,如果 1 秒没处理完就别处理了。
RPC 拦截器
拦截器 = 安检员/分拣中心(在包裹真正到达收件人手里之前,先检查一下快递单,或者对包裹做个消毒)
装“上下文”信息
它是一种钩子机制(Hook)。它允许你在请求发送出去之前(客户端)或者请求被处理之前/之后(服务端),插入一段通用的逻辑代码。
它的核心目的是把通用逻辑从业务代码中剥离出来(AOP 面向切面编程的思想)。可以进行:
身份认证: 在进入业务逻辑前,检查 Metadata 里有没有 Token,Token 对不对。如果不对应,直接拦截退回,业务逻辑根本不用写判断代码。
日志记录: 记录“谁在什么时间调了哪个接口,耗时多少”。
错误处理: 统一捕获异常,转换成标准错误码。
限流/熔断: 检查请求是不是太多了,如果太多直接拦截。
客户端拦截器
在 context 文件中编写拦截器,之后加到 rpc发现服务中
需要注意:
什么时候存储metadata
怎么存
拦截器怎么通过 context 传值
服务端拦截器
在启动 RPC 服务之前进行拦截器的注册
拦截器的业务逻辑实现
服务端怎么从 metadata 中取到数据
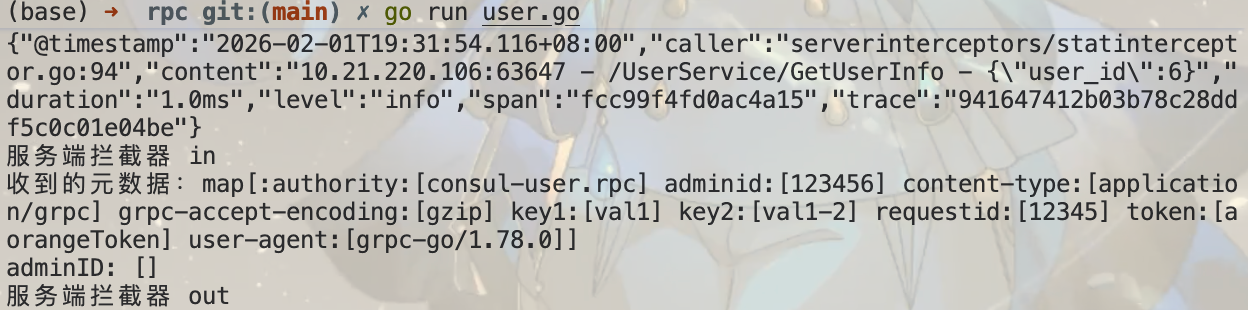
测试
经过简单测试,服务端收到来客户端的元数据并进行安正
错误处理
可以自定义错误类型,输出更加全面
定义自定义格式错误
业务代码中按需使用定义的错误
告诉 go-zero框架我们自定义了错误类型要进行处理
下面是测试结果
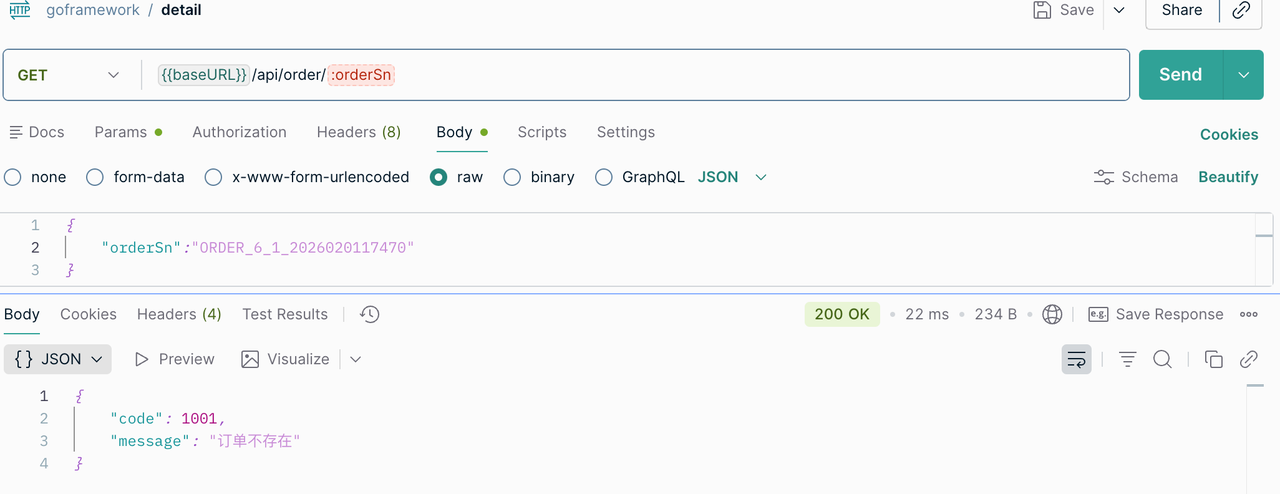
修改模板生成自定义代码
模版的作用:生成项目代码,goctl指令生成代码的时候就是根据模板来生成代码的
修改模版的主要指令
goctl template clean # 用于删除持久化在本地的模板文件。
goctl template init # 用于初始化模板,会将模板文件存储到本地。
goctl template revert # 用于回滚某个分类下的指定的模板文件。
goctl template update # 用于更新某个分类下的所有模板文件。
这样在指定目录下就能看到.goctl文件夹,里面存储 tpl文件,我们可以修改文件内容,实现生成项目文件的自动定义